
How I Built My Home Server: A Comprehensive Guide with Parts and Configuration

Introduction to Home Servers: The Why and the What
In the realm of technology, home servers have emerged as powerful tools for individuals seeking greater control over their data, media, and network infrastructure. These versatile machines offer a plethora of benefits, including:
Personal Cloud Storage: Establish your own private cloud storage solution, eliminating reliance on third-party providers and ensuring data privacy.
Media Streaming Hub: Stream your favorite movies, music, and TV shows directly from your home server, accessible from any device within your network.
File Sharing and Collaboration: Share files seamlessly with family and friends, collaborating on projects without the hassle of cloud storage limitations.
Network Security Enhancement: Implement advanced security measures to protect your network from cyberattacks and safeguard sensitive information.
Building Your Home Server: A Hardware Shopping Spree
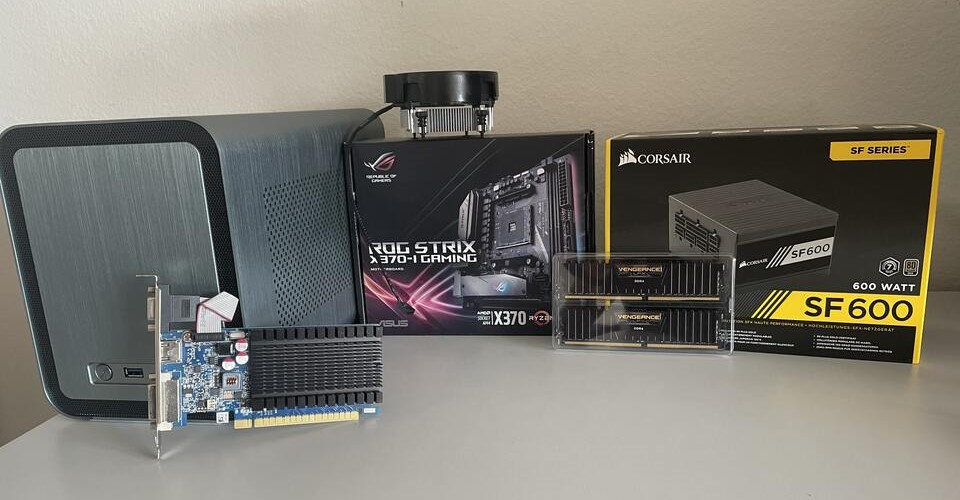
The foundation of your home server lies in the hardware components, each playing a crucial role in its functionality and performance. Here’s a breakdown of the essential components:
Case: Choose a server case that accommodates the desired hardware and provides ample cooling for optimal performance.
Motherboard: The backbone of your server, the motherboard determines the compatibility of other components and supports various expansion capabilities.
Processor: The brain of your server, the processor handles computational tasks and ensures smooth operation of applications.
RAM: Memory plays a vital role in multitasking and running multiple applications simultaneously. Choose RAM with sufficient capacity for your needs.
Storage: Select storage drives that offer ample space for your data, considering both capacity and performance requirements.
Networking Components: Equip your server with Ethernet ports and a network adapter to connect to your home network and the internet.
Software Installation: The Heart of Your Home Server
With the hardware in place, it’s time to breathe life into your home server by installing the appropriate software. Popular operating systems for home servers include:
FreeNAS: A free and open-source NAS (Network Attached Storage) operating system, ideal for file sharing and data management.
UnRAID: A powerful and versatile operating system, supporting various storage configurations and offering data protection features.
TrueNAS: A robust and scalable NAS operating system, suitable for advanced users and demanding workloads.
Configuration: Fine-tuning Your Home Server
After installing the operating system, embark on the configuration process to tailor your home server to your specific needs. This may involve:
Network Configuration: Set up network settings, including IP address, DNS servers, and network sharing permissions.
Storage Configuration: Create storage pools, configure RAID arrays, and establish user access permissions.
Media Server Installation: Install media server software like Plex or Emby to stream your media collection seamlessly.
File Sharing Services: Set up file sharing protocols like Samba or NFS to share files with other devices on your network.
Security Measures: Implement firewall rules and intrusion detection systems to protect your server from cyber threats.
Conclusion: Embracing the Power of Home Servers
Building and configuring your own home server opens up a world of possibilities, empowering you to manage your data, media, and network infrastructure with greater control and flexibility. Embrace the journey of DIY server ownership and reap the benefits of a personalized digital hub tailored to your unique needs.